Login with Google
Create Google App
- We need google client id and secret that way we can get information of other user. So if you don't have google app account then you can create from here: Google Developers Console.
- Now you have to click on Credentials.
- Click on Create Credentials.
- Click on Outh Client Id.
- To create an OAuth client ID, you must first configure your consent screen
- In OAuth consent screen page, Select External
- In the next form, put your App name
- Upload your Logo
- Put your Domain, privacy policy, terms of service url and save. Consent screen has been created.
- It's time to create OAuth client ID
- It's time to create OAuth client ID
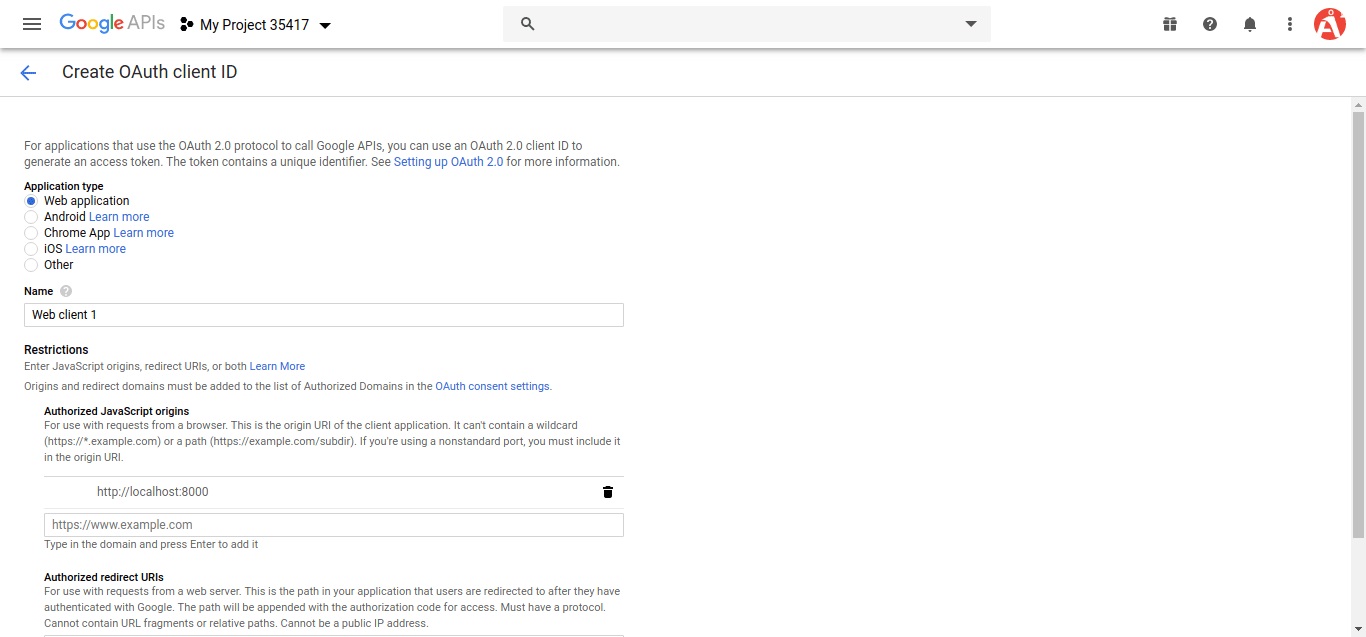
- Put Application type to Web Application
- Put a Name
- Put your Server Url in Authorized JavaScript origins. eg. https://www.yourdomain.com
- Put your admin panel's redirect URL in Authorized redirect URIs. eg. https://admin.yourdomain.com/api/v1/user/social-login/callback/google
- Click Create
- After create account, please copy client id and secret for later use.


Setting the Google configuration
Now it's time to put the client id and secret in the server.
- Log in to your admin panel.
- Go to Settings > Social Login
- Change the Google Client Id and Google Client Secret.

Clearing cache
Now it's time to clear the cache of the backend.
- Open admin.yourdomain.com/api/clear-cache in the browser. Cache has been cleared.
You can also clear the cache from the admin panel also.
- Login to your Admin panel.
- Go to Setting > Clear cache.
- And click Clear cache button. Cache has been cleared.
